
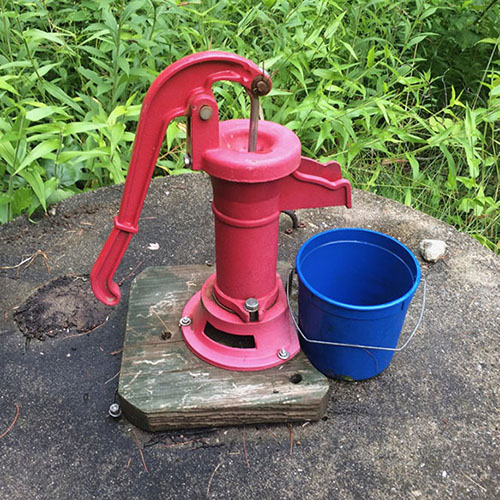
A key component of the homestead’s preparedness is a water supply that is not dependent on the grid. A “dug” well is usually a detriment in the real estate market: not so, for me. That feature was a plus for me.
Shortly after moving in, I made the well a prep. I bought an inexpensive “pitcher” pump and a length of hose. The well head already had a small opening (with a plug) for inspections. The installation went pretty quickly. I opted not to use a foot valve to keep water in the draw tube. That meant having to prime the pump for each use but it also assured it would never freeze in the winter.
We use the hand pump primarily for watering the fruit trees which are beyond hose range. During power outages that last more than a day, the hand pump has provided all the water we needed. Sure, it is more work to manually pump and haul the buckets up to the house. It is also a huge peace-of-mind knowing that water — that very vital prep — is available.
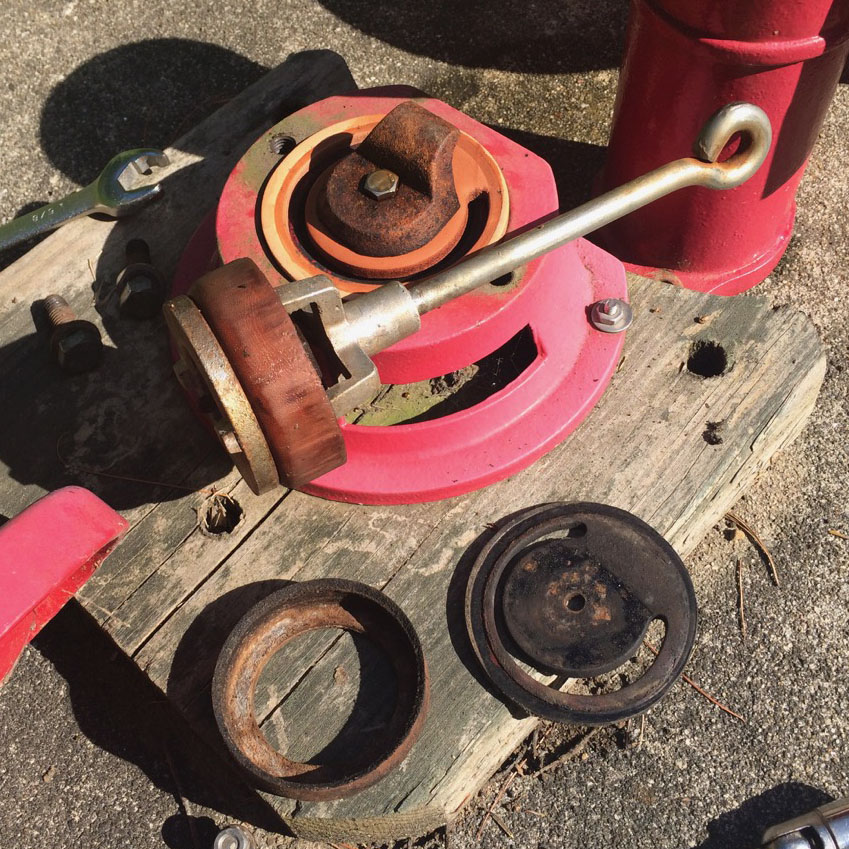
As easy and simple as the hand pump is, it is not without its maintenance needs. I just got done replacing the two leather seals, so figured I’d share the “tune up” process so you could see how simple a pump can be.
Sucking Air
After the long winter of disuse, the pump would not raise water even after generous priming. Both seals, being leather, tend to dry out and shrink if not used regularly. They usually swell back into shape after being kept wet a while. Not this time. I could hear that the pump was sucking air in through the bottom seal. It was not swelling back into place. Since it was already a few years old, it was time to replace it.
The upper seal is like a piston ring in a car’s engine: sealing between the piston and the pump’s cylinder wall. When you push down on the handle, you pull the piston up. If there’s a good enough seal, this vacuum pulls water up from the well. The photo below shows the pump base with the new (brown) “flapper” seal and the piston with its new brown upper seal. The old (blackened) seals are laid in front
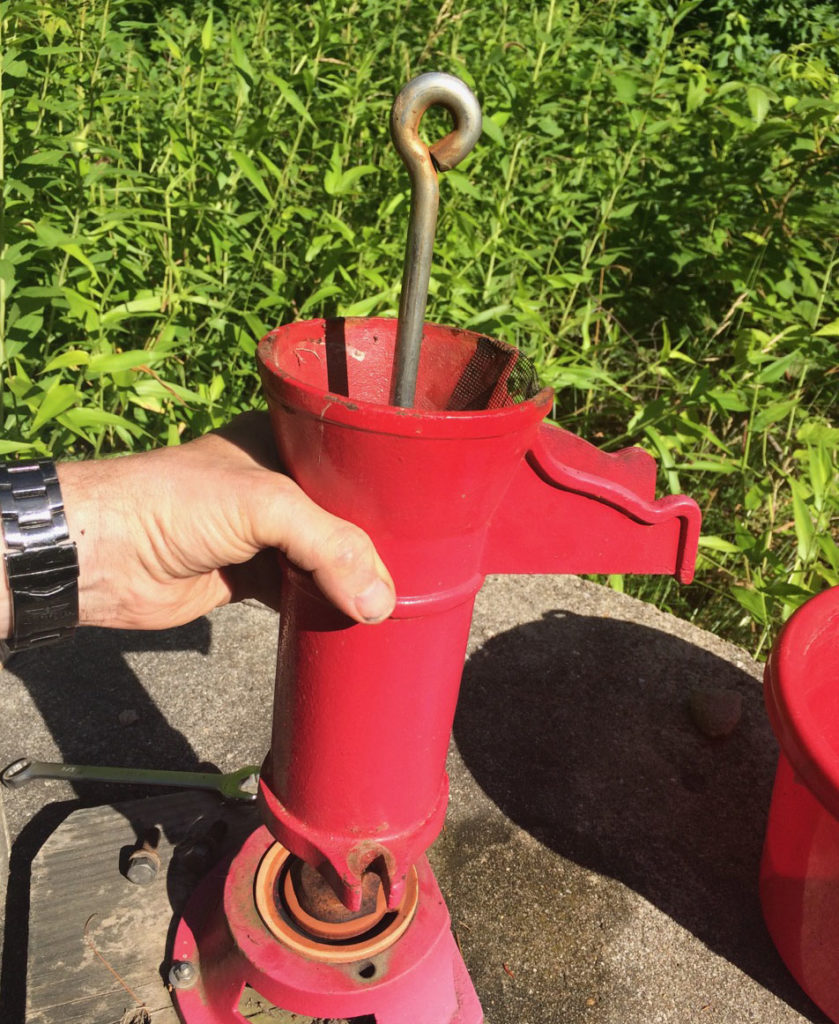
When you pull up on the handle (pushing the piston down), a metal valve in the piston lets water already in the cylinder flow through the piston. Downward pressure keeps the bottom flapper seal shut so the water stays in the cylinder. The next up-stroke forces the water within the cylinder out of the spout while pulling in the next batch. That’s how it works, when it works.
If either leather seal doesn’t do its job, you got nothing but exercise. Upper seals wear out since they rub against the sides of the cylinder. Lower seals shrink to where they let the piston suck air instead of water.
After replacing both seals, the reassembly was pretty simple. There are two big bolts that hold the cylinder to the base. The only tricky part is making sure the lower seal is fully captured by both the base and the cylinder. Any gaps let air in when you pump.
Priming the Pump
Even with new seals, this pump requires priming. With the piston at the bottom of the stroke, I pour a small amount of clean water (maybe a cup) down the hole in the top. This water provides a tighter seal between the upper leather seal and the cylinder wall than merely leather-to-steel alone. After priming, it takes only a few strokes to get the water flowing.
The pump doesn’t need re-priminging if there’s only a short while between sessions. The seal stays wet enough. Come back five to ten minutes later, and it needs to be primed again. Knowing that this is how it goes, my last strokes of a session includes filling up a bottle with clean pump water. The bottle goes in the nearby shed to serve as the next session’s priming water.
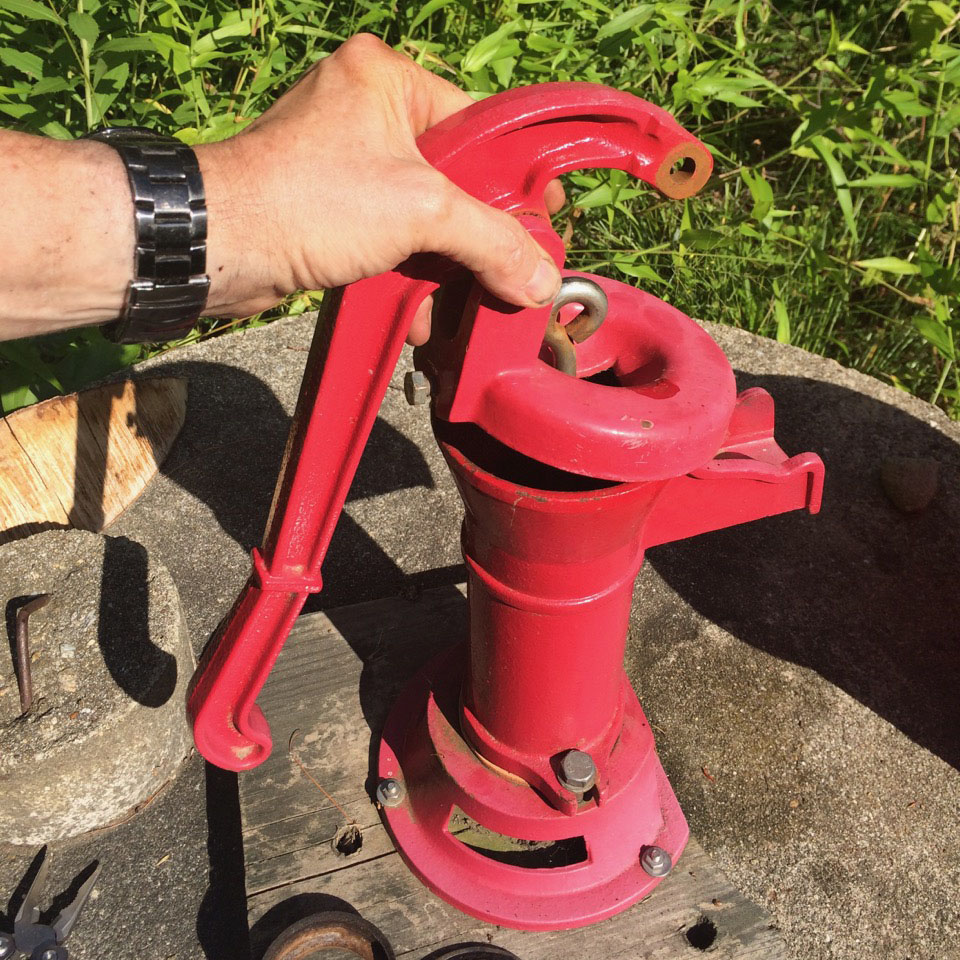
Although I’ve mused about setting up some solar panels and a small electric pump, the barebones simplicity of my little pitcher pump has its appeal. Three moving parts, two replaceable seals. That’s it. In an extended grid-down event, simplicity is golden.
Having a reliable water supply is a big relief. That leaves me free to work on food, heat, and safety preps.
—

Mic have you looked at pool shock for water purification and well cleaning? Sometimes some small critter falls into the well and things get nasty. A large dose of chlorine is the cure. I followed the instructions for Pool Shock to make up 4 gallons worth of chlorine mix then treated my well once. Waited 24 hours then pumped until the smell of chlorine dissipated. Pool shock is cheap, a pound is good for some 10,000 gallons purification. Keep it dry and away from electronics as it outgasses and it lasts nearly forever.
Water is life. Have you looked into rain collection as a backup? My dug well often gets pretty low with an extended dry spell. My kit is a 40 gallon screw top olive barrel with 2 pounds of Pool Shock, a 10 X 20 tarp, several smaller tarps (easier to handle in windy rainstorms) 550 cordage. The rainwater collection formula is Collection area in square feet X inches of precipitation X .623 = gallons of rainwater collected. I find even a heavy mist puts a decent amount in my 40 gallon barrel as 10 X 20=200 square feet X .1 inch precipitation X .623 = 12 gallons.
My secondary tarps are a bit more square footage than the big one so I could almost double the collection area.
I am also looking into picking up a couple of IBC 325 gallon totes as a 1 inch rain would be 120 gallons from that tarp, using all my tarps in the kit that would do a decent job filling an IBC.
Getting ready to start the snow shoveling here. Hope you and yours are well for Christmas.
Hi MIchael,
Yes, I’m familiar with pool shock. My former house had an in-ground pool, so it was a common household item. I do need to get some more, though. The current house has no pool and the old supply is gone. Thus far, I’ve used liquid bleach on the well once.
I do have rainwater collection as a backup. We’ve not used it for drinking water, but we could treat it if need be. Of course, part of getting ready for winter is emptying the 55-gallon barrel so it (or the fittings) doesn’t freeze. In winter, there’s less worry about running out of water, what with all the snow to be melted. The heavy snow last week left the homestead with plenty of water reserves. :-/ (had 18″ in the yard)
One of my upcoming projects for Spring is to add rainwater catchment to the chicken coop and run. I’m figuring that as drip irrigation for the fruit trees, mostly. Going to try and rig up some small-scale solar and a 12v pump for that. That should prove interesting.
Hope you have a great Christmas too!
Soft Spam,
It is interesting to see ‘soft spam’ as a sneaky technique to infiltrate blog comments. For just this one post, I received two “comments,” the text of which is copied below.
“All the things regarding the off grid water on keeping a hand pump pumping. This article mentions and acts as such a moving trigger. It is an article worth applauding for based on its content. I am sure many people will come to read this in future.”
and
“Thank you for making us read this well written article on off grid water keeping and a hand pump pumping. I enjoyed reading this article. Such illustrations are given that a layman could even understand. It is an easy to comprehend blog which can be instigated by all at least once. I am sure many people will come to read this in future.”
MAKING them read? Notice the really poor English, suggesting it was a Google-Translate product. The gist of the comments are all fluff. The spam part is that the poster includes a website with their ‘name’ in hopes that people will click the name and be taken to their site.
I have the. blog set to moderated for comments for just this reason. Such comments are the above to not get approved. Spam is sneaky.