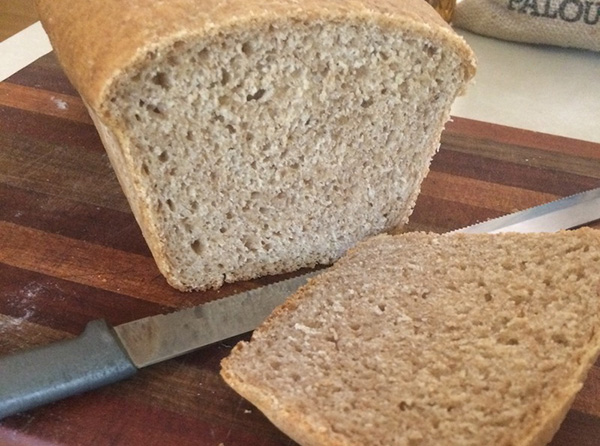
A friend at church wanted to bake sourdough bread. The many articles and YouTube videos he watched intimidated him. So many variables. This “how-to” is to show that fresh homemade sourdough does not need to be all that complicated.
I am not a master chef, nor do I play one on TV. I started making sourdough bread at the beginning of the lockdown and shortages because the store shelves had been stripped of commercial bread, flour, and yeast. I had one jar of yeast, but I knew it would not go far. I’d never made sourdough before. The lockdown seemed as good a time as any to learn.
Making bread can be complex and involved, but it does not have to be. Sakes knows there are a jillion recipes and methods. Clearly, there is no one right way to bake bread. Below, is the recipe and routine I’ve settled into as the pandemic & lockdown kept us at home. A little trial and error learning and I got it down to a pretty easy routine that takes maybe 20 minutes total time in the kitchen during the morning. By early afternoon, I’ve got a fresh loaf of bread.
Keeping It Simple
I’ll run through my process and recipe first so you can see how simple it is. Below that will be some background bits for those who wish to know more. But, knowing more is not essential. Also, It looks like a lot of steps, but each one is quick and just a step along the way so you can see what it looks like.
Ingredients:
1 cup fresh ground whole grain flour
1 cup bread flour (with another 1/2 c in reserve)
1/2 Tbsp salt
3/4 cup water
Simple, right? No esoteric ingredients. You can get as fancy as you want but it’s not necessary for a basic loaf.
Step One: Take Starter Out of Fridge
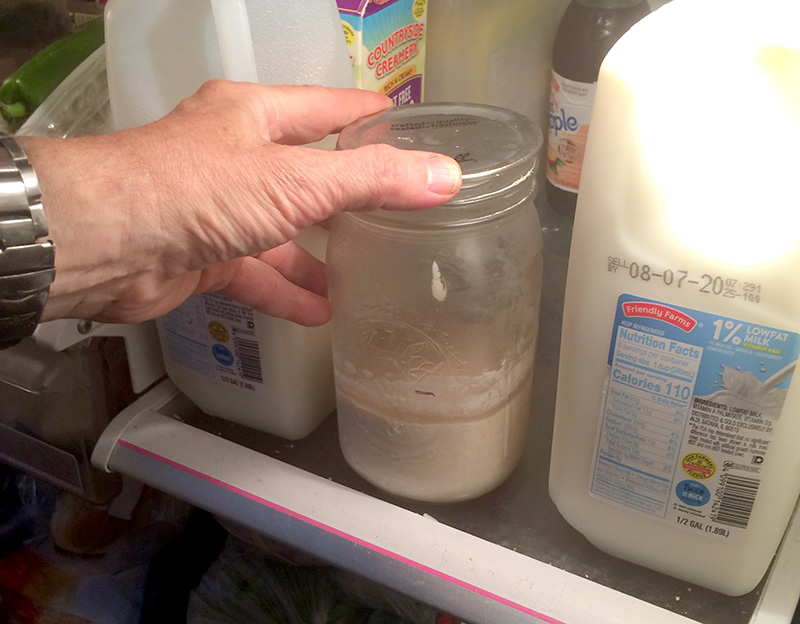
I keep about half of a quart of starter in the fridge between bakings. I take it out the night before I plan to bake so it can warm up to room temperature.
I stir in whatever ‘gray’ water has separated out and feed it a half cup of flour. I add enough cool water (a little at a time) to maintain a pancake-batter consistency. Stir well. The starter then sits on the counter overnight to warm up and get active again. I try to do this around 6:00 p.m. so my morning feeding will be around 12 hours later. I like to mark the level of the starter so I can see how much it rose overnight.
Two: Morning Feeding
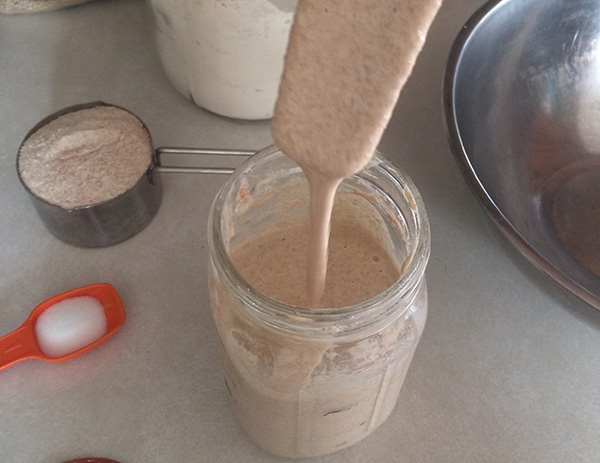
The next morning, I look for the ‘bathtub ring’ on the inside of the jar. This tells me the starter rose after feeding, then fell back. This is proof that the cultures are still active. I feed my starter another half cup of flour and enough water to maintain consistency. Stir well and mark the level again. For me, this is around 6:30 a.m. or so.
Three: Get Ingredients Ready
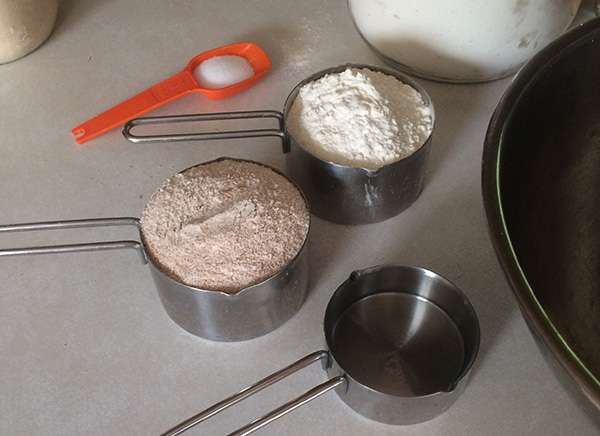
It will take the starter an hour to an hour and a half to rise to maximum activity. I want to use it at its peak, so after feeding the starter its breakfast, I grind up wheat berries to make 1 cup of whole-wheat flour and measure out 1 cup of bread flour. I set aside a half tablespoon of salt so I don’t forget it.
Four: Hydrate the Whole Wheat
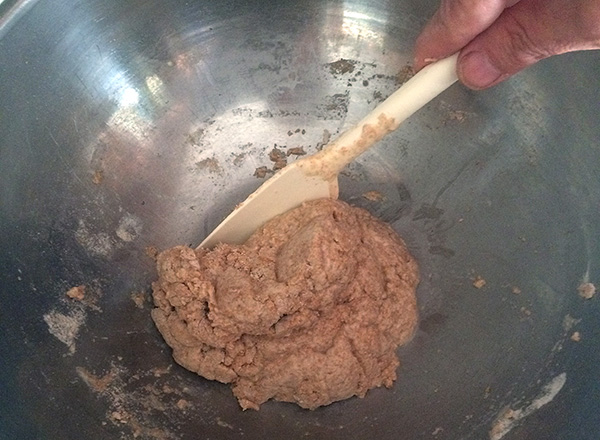
Freshly ground whole grain flour absorbs water more slowly than commercial flour does. So, what I’ve been doing is put my 1 cup of fresh ground in my big mixing bowl, add 1/2 cup of cool water and mix well. It might take a little more water (+/- 1/4 cup) to make a sort of mud-pie ball. Let it sit in the bowl and hydrate until mixing time.
Five: Add Starter
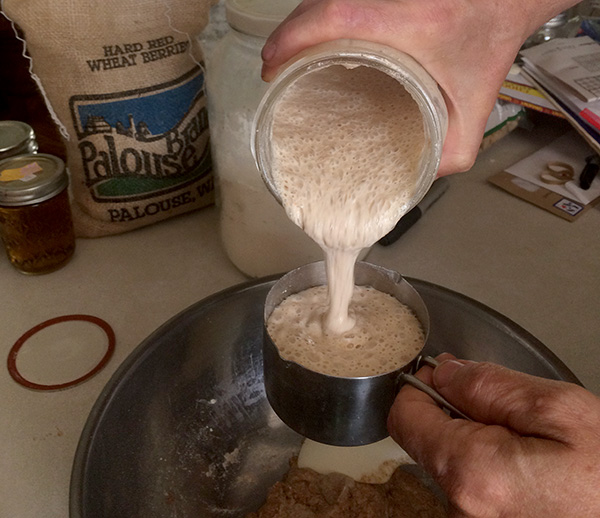
Watch your starter periodically to monitor its rise. If you took note of how much it rose overnight, you’ll have an idea how high it will go. For me, it will fill the quart jar to almost overflowing. (and it did, once) This has typically been about an hour to an hour and a half after its morning feeding. (7:30 to 8:00) depending on how warm or cool the kitchen is. At that peak, I pour 2 cups of that highly active starter into my bowl with my hydrated wheat ball. Add the salt and stir it in until well blended.
Six: Slowly Add Bread Flour
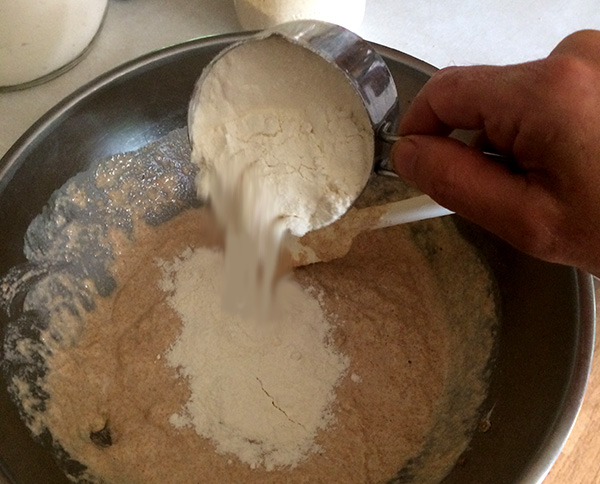
Add bread flour slowly, stirring it in until you’ve put in the whole cup. The dough will be too stiff to stir by that point. You’ll have to resort to hands. If the dough is still really sticky, add a bit more flour, stirring/kneading it in until the dough pulls away from the bowl rather than sticking to it.
Seven: Knead
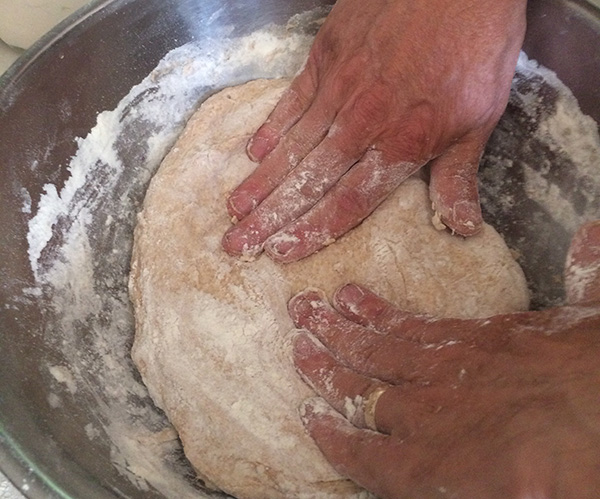
I flour up my hands and begin kneading, right in the bowl. Less clean-up that way. Flatten, fold it in half, flatten, repeat. If the dough is too wet and sticky, add in a bit more bread flour, kneading it in. I’ll pull it and stretch it a few times too. The goal is a dough that’s flexible and stretchy and does not stick to the bowl. Do this for about five minutes or so.
Eight: Let Rise
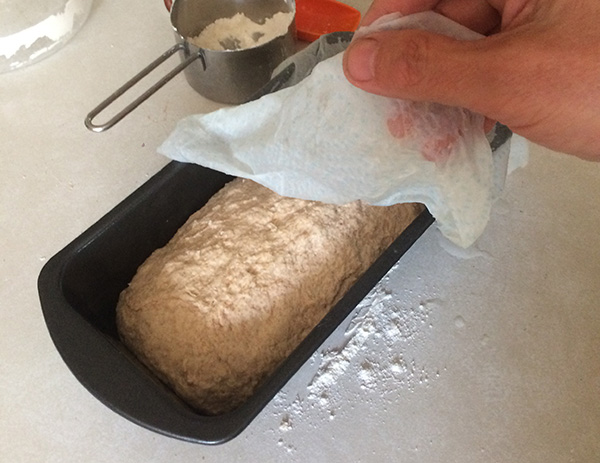
Shape the loaf into a fat hotdog shape and place in an oiled loaf pan. Cover with a damp towel and set in a warmish place to rise for an hour and a half to two hours or more, depending on how warm it is. When our house isn’t all that warm, I’ve turned on the oven for just a few minutes to warm it up to around 100° and put the dough in the oven. This summer, the kitchen is warm enough as it is.
Nine: Bake at 350°
When the dough has risen above the edge of the pan, and a gentle finger poke in the dough ‘heals’ slowly, it is time to bake. I put it in the oven set for 350° F. I don’t wait for it to preheat. Just put the loaf in and turn it on. Baking time (including pre-heat) is 45-60 minutes, depending on your oven.
Ten: Let It Rest and You’re Done!
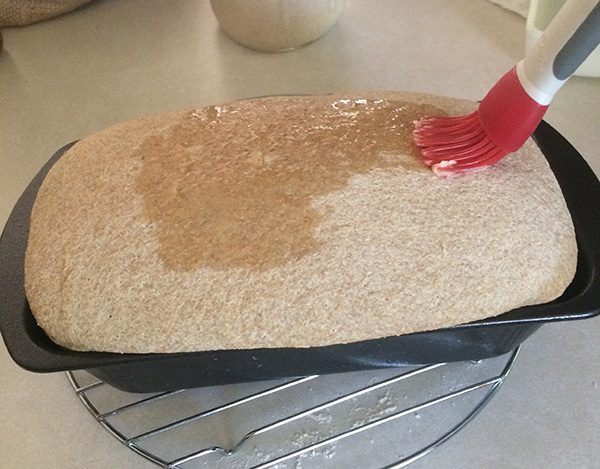
Near the end of the cooking time, tap on the top of the loaf. If it sounds hollow and it looks golden to your liking, remove the loaf to a cooling rack and brush top with butter. This keeps the crust from getting tough. Take the loaf out of the pan and let it dry for an hour or so before putting it in a bag. (or eating it all)
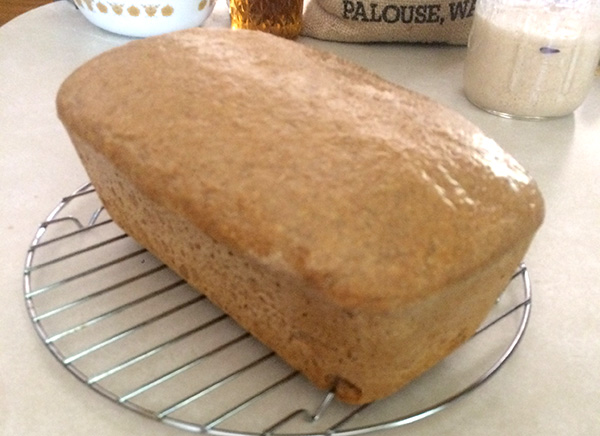
There, you just made a loaf of bread using your own homegrown, sustainable yeast, and it was not complicated. This process works for me and I’m far from an expert baker. Being able to leaven bread with natural yeasts is a good skill for a prepared person to have. If I can do it, you can too.
Related Topics For Further Reading Below
– Longevity: How long does homemade sourdough stay ‘good’?
– How to make your own starter
– Customizing the taste of your bread by tweaking your starter
– Putting your starter on hold (in the fridge)
– What to do with discards?
Longevity?
Since you’ve added nothing other than flour, water, and salt, your loaf might mold more quickly than a commercial bread product with preservatives. For the dear wife and I, one of these modest loaves takes about a week to eat. If kept out at room temperature, a loaf like this might last five days before you start to taste a hint of mold. We keep ours in the fridge to avoid that.
Starting With The Starter: A How-To
All sourdough recipes presume you have a sourdough starter. You can buy it, or make your own. This takes a little time to create but it is not that hard. All you need is flour, water, and patience. Melissa K. Norris has a good Sourdough Starter Tutorial for free. Basically, you combine a half cup of flour with enough water to create a pancake-batter consistency. Stir well. Let it sit in a warmish place with a loose cover (to keep out dust and flies but let out the carbon dioxide).
Fresh ground whole wheat (or rye) works faster.
The natural yeasts and bacilli that you want to cultivate live on the outside of wheat grains. The commercial milling process removes the bran and most of the yeasts you want but some still survive in unbleached commercial flour. Bleached flour not only has no live yeasts, it actually seems to inhibit their growth. Don’t use bleached flour.
After 12 hours, feed your starter another half cup of flour and enough water to maintain the smooth batter consistency. Norris suggests feeding your starter every 12 hours. That worked well for me. You won’t see much action for a few days but hang in there.
After another 12 hours, discard half of the mixture (more on that below) and add another half cup of flour and water. This will be the pattern for the week. Feed once in the morning. Discard half before the evening feeding.
Somewhere around day two or three you may see bubbles forming; that’s good. The yeasts and bacteria that are naturally on the grain are starting to multiply, eat the starch and make carbon dioxide.
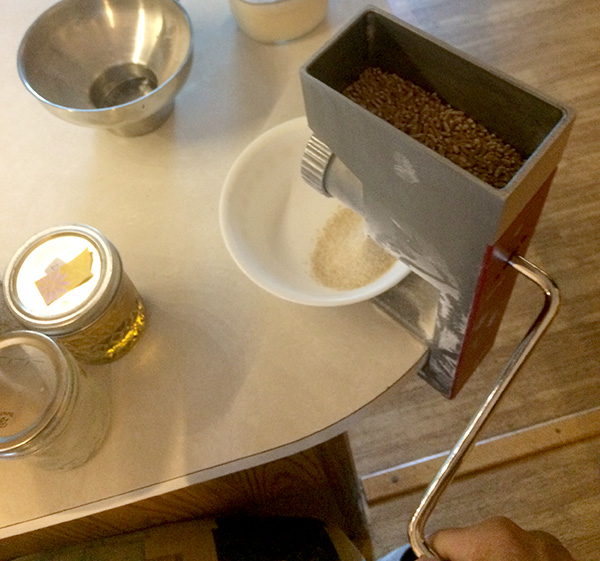
I ordered some whole grains from Amazon to have the unprocessed bran too. I’ve used this Victorio hand grinder for years. I wanted something I could use without grid power. I got the motorizer attachment but it hasn’t been that great a value. It’s slower than hand grinding. Hand grinding with the Victorio has been so easy that the motor isn’t much help. I guess the company name changed to Roots and Branches a couple years ago, but it’s the same mill.
Five to seven days of this feeding routine and you should have an active population of yeasts and lactobacilli. You should notice that it rises noticeably an hour or two after a feeding. It might start to smell yeasty or faintly alcoholic.Those are good signs. There are many tutorials out there for making a starter, so I won’t belabor the point here. The bottom line is, it’s not hard, it just takes time.
Customize Your Starter
Ken Forkish, in his book “Flour Water Salt Yeast,” describes how you can adjust your starter from mild/sweet to strong/tart. Starter cultures are made up of two different fermentation agents: Yeast and Lactobacili. Yeasts produce acetic acid — the tartness agent. Lactobacilli produce lactic acid — the sweetness fermenting agent. Both make carbon dioxide bubbles — the leavening agent.
A thicker starter favors the yeast. A warmer setting favors the yeast.
Stronger Yeasts give a more-tart taste
A runnier starter favors the bacilli. Cooler temps favor the bacilli.
Stronger bacilli give a milder taste
Since my wife is not a huge fan of tart sourdough, I’ve kept my starter on the thinner side (like a runny pancake batter) and cooler. The result has been that my “sourdough” bread that has very little tartness. It’s pretty much just plain wheat bread. She likes it that way. Your tastes may vary.

Customize Your Bread
My recipe calls for 1 cup of fresh-ground whole wheat but you can substitute other grains within that cup to get different flavors. I got a variety of grains from Amazon to expand my taste horizons. Hard white wheat has a milder flavor and a lighter color. Hard red wheat has the nuttier traditional whole wheat flavor. Rye has a mild, but earthy flavor. Whole barley can be interesting in small portions. It adds a Triscit-cracker-like flavor. Barley will darken the loaf in larger amounts and is prone to dryness, so take it easy. Oats are fine, though lacking in gluten so need to be a small amount (1/4 c or so).
Discard? Seems Wasteful
Throwing food away goes against the prepper mindset. The main reason of the discard is that if you keep adding without discarding, you’ll quickly fill up your container AND the half-cup of flour at each feeding becomes a lesser addition (by proportion) of new food to starter colony.
A lot of people have ‘discard’ recipes on the interwebs. I’ve made crackers, flatbread, and even some barely-edible hardtack that only the chickens enjoyed. But, it got eaten, so it was not a waste.
Time Out For Next Time
After I’ve made a loaf of bread, I feed my starter again right after mixing the dough and that evening. Then, it goes in the fridge. In the cool temps of the fridge, all the bio-processes slow way down. A starter only needs to be fed once every few days to a week. After a couple of feedings before its “time out,” I’ll have a half a quart again, ready to repeat the process next week.
My starter is kind of a perpetual “levain,” and not a traditional starter, for you readers more versed in baking. Whatever. What I’m doing works well for me and keeps us in bread.
Conclusion
This virus lockdown stuff pushed me into learning to bake bread without relying on commercial yeast (mostly because I couldn’t buy any). The result has been learning some skills and a bit more self-reliance. If you’ve ever thought you’d like to try baking bread — especially homegrown-yeast sourdough bread — give it a shot. It doesn’t have to be as intimidating as it might seem. I’m proof that your average guy can make it work. You can too.
—


Excellent Mic! I guess I need to break out the hand mill and get ‘er done 🙂 I’ve done a fair number of yeast bead making now sourdough especially since you showed how to make it “mild” flavored is on this months project list. A strong sourdough flavor would not please my bride.
In my families SHTF diet the two of us would eat a loaf a day as a large part of our calories and a decent amount of proteins.
Have you given thought to making cinnamon rolls out of that extra dough?
Yes, that mildness trick was golden here, so glad I read about that in Forkish’s book. The dear wife loves fresh bread but isn’t too fond of the tartness — certainly not as a regular diet item. If you were eating a loaf a day, you could skip the refrigerator part — probably best since in SHTF the fridge would likely be out of action. You could keep the ‘waiting’ starter in a basin of cool water to slow it down and help favor the bacilli.
Per the cinnamon rolls, there’s no extra dough. What I mix up becomes the loaf. However, while getting your starter up to mildness speed, you’d have some extra. My daughter-in-law has become well versed in recipes to use discard. I believe cinnamon rolls was one of them.
Let me know how your sourdough adventure goes.
— Mic
This recipe looks easy and straight forward. I actually have the same hard red wheat berries in my preps and I have the rest of the week off. I’m going to be canning like crazy all week but I want to fit this in. I’ve made bread with flour and yeast but, for me, it’s a perishable skill. Thanks for the detailed instructions. Brian
Hey Brian,
Yes, the recipe is pretty easy. It’s a great way to use your red wheat and grinder as practice (that you can eat!). You’ll want to get your starter going for a week or so before baking bread. Using your red wheat for starter food will help. More wild yeast.
If Jeff’s second-hand intel has anything to it, you might want to have some starter up and running anyhow. You can try dehydrating some of your starter too. (I’ve done that, but not reconstituted it yet to test it) Dried starter gives you an option for later without the weekly feedings and space taken in the fridge.
— Mic
Mic already knows I made the mistake of using Bleached Flour to feed the starter he gave me and the near death experience that starter had. SO day 3 of save the starter program. This am found the “Bath tub ring” showing growth and fall back and the dark water you say to stir back in. Thanks for those details.
Been feeding it with good King Arthur flour Unbleached never bromated (whatever that is). Hopefully tomorrow I’ll take some and using your recipe bake up some sourdough.
Mic my beloved really enjoyed the sourdough bread! Just enough tang to enjoy. It started a bake off at my house.
Also passed on some of that starter to a young lady who works at the Health Food store as her starter was lost. A little like Amish Friendship bread, it carries on. Yes I fed my starter and now it’s resting in the fridge for next time.
Thanks again.